
The Blizzard was introduced in the late 1980s as a signature treat from a popular fast‑food chain, known for its thick, swirl‑filled ice cream that could be enjoyed with a spoon. Over the years, this indulgent dessert has become a cultural touchstone, celebrated for its creamy texture and mix‑in versatility. The Ninja Creami now lets home cooks capture that same indulgence without the commercial kitchen, bringing a nostalgic flavor experience directly to the family table.
Why You'll Love It
-
- Easy, no‑churn method using the Ninja Creami
-
- Customizable mix‑ins for personal flair
-
- Rich, smooth texture that stays soft longer
-
- Perfect for family gatherings or solo treats
"The copycat Blizzard tastes just like the original, but I love making it at home with my kids!"
Essential Ingredient Guide
- Whole milk: Provides a creamy base; choose the freshest milk for the smoothest mouthfeel.
- Heavy cream: Adds richness and contributes to that signature soft‑serve consistency.
- Sugar: Balances the dairy sweetness; you can adjust for less sweetness if preferred.
- Vanilla bean or extract: Enhances aroma; real beans give tiny specks that signal quality.
- Chocolate ribbons: Swirled in at the end for that classic Blizzard ripple.
- Whipped topping: Folded in gently to create light pockets of air.
 Desserts & Sweet Treats
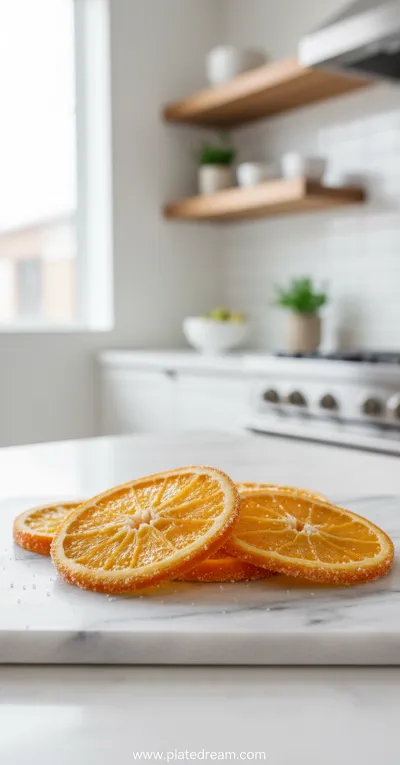
Candied Orange Slices
A simple, fragrant treat of candied orange slices—perfect for adding citrus sparkle to any sweet dish.
Complete Cooking Process
-
Ingredient Readiness:
Measure and blend dairy, sugar, and vanilla until fully dissolved; chill the mixture for at least two hours.
-
Flavor Development:
After freezing in the Ninja Creami, the machine churns to develop a silky texture and lock in flavors.
-
Texture Control:
During the final blend, fold in whipped topping and chocolate ribbons gently to keep soft pockets of cream.
-
Finishing Touches:
Add a drizzle of chocolate sauce just before serving for extra gloss and indulgence.
-
Serving Timing:
Serve within 15 minutes of the final blend for the optimal creamy texture; it softens gracefully after.
-
Chill the base thoroughly before loading; it yields a smoother churn.
-
Do not over‑mix the ribbons; a light fold keeps swirls distinct.
-
Store leftovers in a shallow container; it prevents ice crystals.
-
If the mix feels too hard after refrigeration, let it sit at room temperature for 5 minutes before serving.
Pro Tips
Well, these little adjustments make a world of difference. I’ve found that a brief pause on the counter lets the ice cream relax just enough to melt in the mouth without losing its structure. So, take a moment, breathe, and enjoy the process as much as the dessert itself.
The essence of the dish:
It’s all about the silky base, a sweet vanilla backbone, and the chocolate ribbons that swirl like gentle clouds. The texture stays soft, almost like a cloud‑kissed dream, and the flavor is comforting yet bright.
A fun fact or historical angle:
The original Blizzard was designed to be thick enough to hold mix‑ins without sinking, a clever engineering feat that kept fans coming back for more.
Flavor or sensory focus:
Expect a first bite of cool, buttery cream, followed by a whisper of chocolate that melts into a silky river. The aroma of vanilla rises as you scoop, inviting you to linger.
You Must Know
-
Keep the base well‑chilled before churning.
-
Fold mix‑ins gently after the spin.
-
Serve promptly for ideal softness.
Frequently Asked Questions
→ Can I use a dairy‑free milk?
Yes, substitute with almond or oat milk, but the texture will be slightly lighter. Adjust the cream proportion for extra richness.
→ How long can I store the Blizzard?
Store in an airtight container in the freezer for up to a week. Let it soften for a few minutes before serving.
→ What mix‑ins work best?
Chocolate chips, crushed cookies, or fruit purees are excellent. Avoid watery ingredients that can cause ice crystals.
→ Do I need to pre‑freeze the container?
Yes, the Ninja Creami requires the container to be frozen solid, usually at least 24 hours.
→ Can I make this without a Ninja Creami?
It’s possible with a traditional ice‑cream maker, but you’ll miss the super‑smooth texture the Creami provides.
→ Is the recipe gluten‑free?
Absolutely, unless you add mix‑ins that contain gluten.
Nutrition Facts
per serving
260
Calories
4g
Protein
26g
Carbs
14g
Fat
Taste Profile
Rich and sweet with a velvety finish
Ingredient Substitutions
Don't have an ingredient? Try these alternatives
Provides similar richness; may add a faint coconut note.
Creates a buttery caramel ripple; reduce sugar in base slightly.
Recipe Variations
Try these delicious twists on the original
Spicy Version
Add a pinch of cayenne and swirl in dark chocolate for a subtle heat.
Mediterranean Style
Fold in crumbled feta, chopped olives, and a drizzle of honey for a savory‑sweet twist.
Common Mistakes to Avoid
Learn from others' mistakes for perfect results
- Over‑mixing the ribbons, causing them to lose their swirl shape.
- Skipping the full chill step, resulting in a grainy texture.
- Using low‑fat milk, which reduces creaminess.
Meal Prep & Storage
Make Ahead Tips
You can chill the base mixture up to 24 hours in advance; freeze in the pint container, then spin when ready to serve.
Leftover Ideas
Reheat gently in a skillet with a splash of milk to restore creaminess, or let sit at room temperature for a few minutes before scooping.
Perfect Pairings
Serve this with...
Cooking Timeline
Gather and measure all ingredients; whisk milk, cream, sugar, vanilla, and salt.
Refrigerate the base mixture for at least 2 hours, preferably overnight.
Transfer chilled mixture to pint container, seal, and freeze for 24 hours.
Run the Ninja Creami on the 'Ice Cream' setting; churn until smooth.
Fold in whipped topping and chocolate ribbons gently; reseal and freeze 30 minutes.

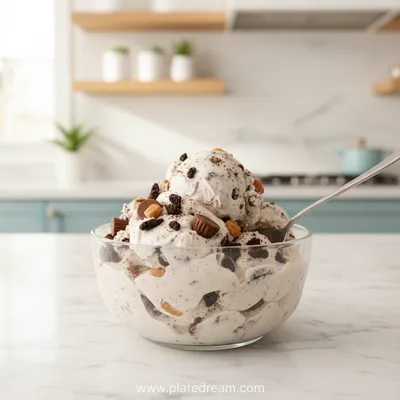
Ninja Creami Copycat Blizzard – Easy Homemade Ice Cream
Discover how to make a smooth, creamy Ninja Creami copycat Blizzard at home—quick, easy, and perfect for any sweet craving. This dessert is a comforting blend of vanilla custard, whipped cream, and swirls of chocolate ribbons that mimic the favorite store‑bought treat.
Timing
Prep Time
20 Minutes
Cook Time
0 Minutes
Total Time
2 Hours
Recipe Details
Ingredients
Base Ice Cream
-
01
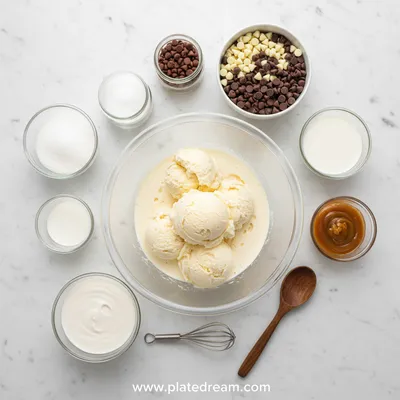
2 cups whole milk
-
02
1 cup heavy cream
-
03
3/4 cup granulated sugar
-
04
2 tsp vanilla extract
-
05
Pinch of salt
Swirl & Mix‑Ins
-
01
1/2 cup chocolate ribbons (or melt chocolate and drizzle)
-
02
1 cup whipped topping
-
03
Optional: crushed cookies or caramel bits
Instructions
In a medium bowl, whisk together milk, heavy cream, sugar, vanilla, and salt until the sugar dissolves completely.
Cover the bowl and refrigerate for at least 2 hours, or until the mixture is thoroughly chilled.
Pour the chilled mixture into the Ninja Creami’s pint container, seal tightly, and freeze for 24 hours.
Insert the frozen container into the Ninja Creami, select the "Ice Cream" function, and let the machine spin until smooth.
Transfer the churned ice cream to a large bowl, gently fold in the whipped topping and chocolate ribbons, creating elegant swirls.
Return the final mixture to the pint container, seal, and freeze for an additional 30 minutes to firm up before serving.
Notes & Tips
-
1
If the ice cream seems too hard after the final freeze, let it sit for 5‑10 minutes before scooping.
-
2
Stir gently when adding swirls to keep the ribbons from breaking.
-
3
For an extra sparkle, drizzle a thin stream of chocolate sauce just before serving.
 Desserts & Sweet Treats
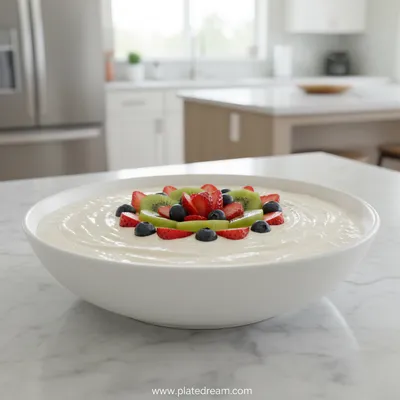
Healthy Yogurt Fruit Dip – Ready in 5 Minutes
A quick, creamy dip that brightens any snack with fresh fruit and tangy yogurt.
Tools You'll Need
-
Ninja Creami machine
-
Measuring cups and spoons
-
Whisk
-
Large bowl
-
Spatula
Must-Know Tips
-
Don’t over‑mix the ribbons; a gentle fold preserves swirl integrity.
-
Let the base chill thoroughly for a smoother churn.
-
Taste the base before freezing; adjust sweetness if needed.
Professional Secrets
-
Use room‑temperature dairy before chilling; it mixes more evenly.
-
Freeze the container on a flat surface for an even solid block.
-
Run the Creami on the "Ice Cream" setting twice for ultra‑creamy texture.

Recipe by
Isabella MartinBaking enthusiast crafting irresistible desserts designed to impress and satisfy every sweet tooth.
Get Delicious Recipes Weekly
Join 25,000+ home cooks getting our best recipes straight to their inbox.
Free forever • No spam • Unsubscribe anytime